Friday, April 26, 2013

Chicken Piccata


Pan sauces are great because they are essentially a one-pot meal. Also, some of the best ones include wine, so I’m naturally inclined towards them.

Switching topics real quick, in my family, we have a “vinegar gene”. A bunch of us really like vinegary, lemony, brine-y foods. Mustard pickle with a side of grilled cheese? Double trips to the pickle bar at our fave Jewish deli? Asking for a pickle if they forgot to put one on your sandwich platter? Capers and balsalmic in your tuna salad? Eating whole lemons ?(actually, that’s just my mother) If you, or someone you love has shown any of these symptoms, he or she may also possess the vinegar gene The only way to satiate it is to have multiple jars of pickles and vinegars in the pantry at all times.

Back to pan sauces. One of my favorite pan sauces is Piccata. I love Piccata because it includes lots of brine-y, acidic ingredients. White wine, capers, lemon---all these things are the tops. I guess there are zillion ways to make Piccata, and an Italian grandmother might turn her nose up at mine, but whatever. I make it a little different every time I make it. Sometimes it depends on my protein. If I make a seafood Piccata, like a swordfish or salmon, I don’t flour the fish. I just pan sear it and then make the sauce in the pan. These versions have more lemon; with extra lemon wedges serve on the side.  When I make it with chicken, and flour the cutlets, I use more oil and butter, so the sauce has a little less edge.

Piccata is also a favorite because it’s easy, and I generally have all the ingredients on hand. I buy big jars of capers at Costco, and use them in pasta sauces, tuna salad, and salad dressings.


Finished Product!

I made Chicken Piccata tonight and was really pleased with it. I had one really large chicken breast I thawed, probably about a half pound worth, so I stamped it out. I was tempted tot throw it on the grill pan and make tacos, but I didn’t have any corn tortillas---no corn tortillas, but I sure as shit had lemons, white wine, and capers. 
Lots of oil.

Golden goodness.

As I become more comfortable with pan-frying, recipes like this turn out better and better for me. Once I got over the amount of oil or butter it takes to get a really good golden brown, I’ve experienced excellent results. I browned the cutlets in this recipe in olive oil, and then used a butter and olive oil combo in the sauce. The olive oil keeps the butter from burning, and the butter adds a rich, creaminess.

Chicken Piccata (serves 2)

For the chicken:
½ pound chicken breasts, stamped out to ½ in thick
½ cup flour
¾ cup olive oil
salt & pepper

For the sauce:
2 tbs butter
1/3 cup olive oil
1 cup white wine
Clove of garlic, minced
Pinch red pepper flakes
Juice of one lemon (see note below*)
1/3 cup capers (more or less depending on your preference)

Stamp out the chicken breasts to ½ inch in thickness. Season the chicken with salt and pepper. Place the flour in a shallow bowl, or pie dish, and coat the chicken evenly on all sides with flour, and shake off the excess.

Heat the olive oil over medium-high heat. Once the oil is HOT, ie the chicken crackles and sizzles when you touch it in the oil, place the chicken in the pan, with space between, and brown on each side for about 3-4 minutes. Do not move it around, but monitor the heat of the pan. I turned the burner down to closer to medium while the chicken browned and it stayed hot enough.

Once the chicken is a nice golden brown, remove it from the pan and place it on a plate with a paper towel to help soak up excess oil. Get rid of the oil you friend the chicken in and wipe the pan clean with a paper towel.

Time to get saucy.

Melt the butter and heat the oil in the pan over medium high heat. Add the minced garlic and red pepper flakes and let it simmer for about 30 seconds. If you manage to burn the garlic, start over. You will know you burned it because it smells gross.

Dump the wine in the pan, and allow the sauce to simmer and the alcohol to cook off, about 2 minutes. After the initial sizzle and deglaze, I turned the heat down to medium while it simmered. Add the lemon juice and the capers, and allow to simmer for another 30  seconds – 1 minute. Season with salt and pepper to taste.
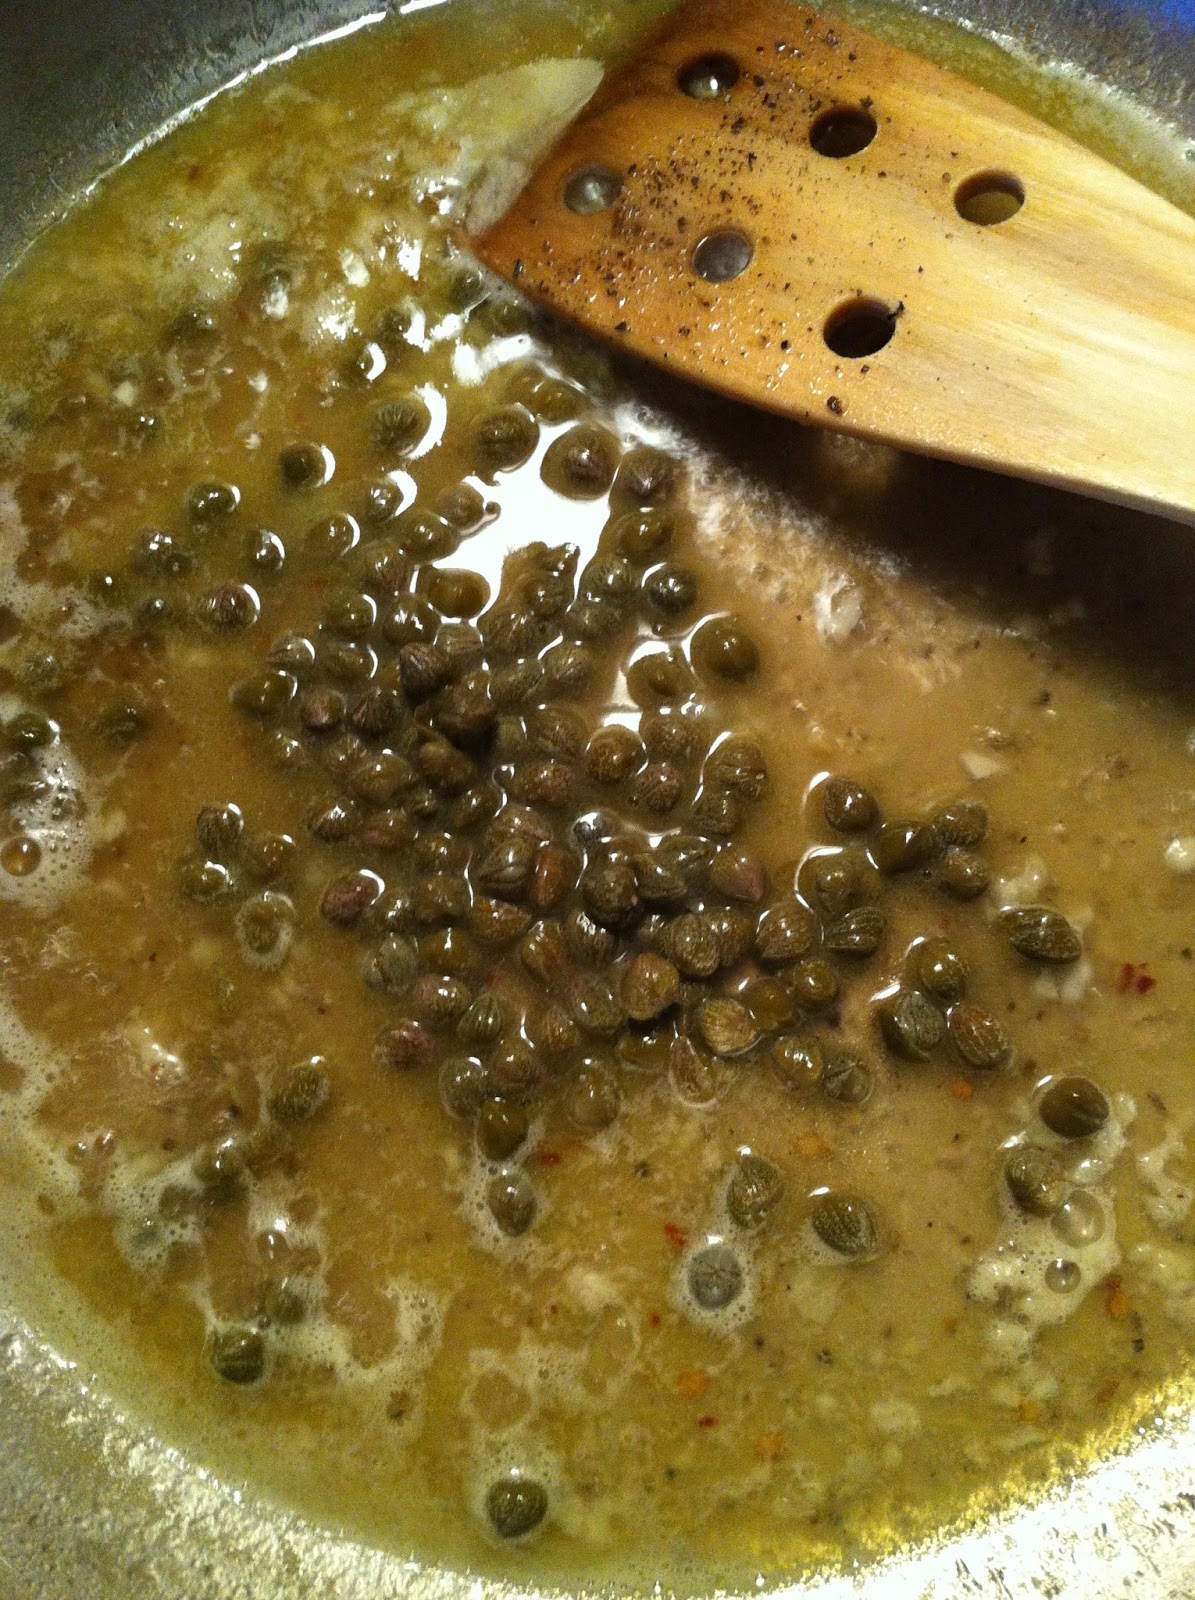
Couldn't you bathe in it?
Spoon the hot sauce over the chicken and enjoy immediately. This goes really well with pasta and roast potatoes if you want a starch, or just by itself. If you are serving this over pasta, you might want to bump up the amount of sauce by about a third.  I just had green beans with mine, so the sauce was just the right amount.

 *If you aren’t a huge lemon person, cut back on the lemon juice. Maybe start with juice of half a lemon and add more at the end. One person a lemon lover the other not? Keep the juice in the sauce minimal, and serve the chicken with lemon wedges.

Wednesday, April 17, 2013

Mise en Place


I would hardly call myself an organized person. I pay a lot of late fees, miss birthdays, make impulse purchases, and buy snacks when I already have a forgotten drawer full two feet away.  For every victory I achieve in organization, like changing my wardrobe from winter to spring, I am sure to incur at least one failure, like getting a notice that a small medical bill has gone to a collection agency because I forgot to pay it.  The one place that I really like to remain organized, however, is in the kitchen.

I mentioned before that I have received temporary and partial bans in the past from my mother’s kitchen because I would make horrific messes. A lot of the messes that I made stemmed from the fact I was extremely disorganized. I would forget a cup of sugar, forget to crack an egg, leave something on the burner too long, resulting in hasty last minute corrections laden with spills, splats, and yucks.  Thankfully, it is fairly easy to be organized in the kitchen with small amounts of planning and prep work.

One of my favorite culinary concepts is “mise en place”, which literally translates to, “put in place”. If you can follow the concept of mise en place, you can really get cooking in the kitchen (hehe).  You know how when you watch a cooking show, they have all those cute little bowls filled with the measured portions of the ingredients, and they just effortlessly dump everything in as they bop along? I mean, I’m sure Ina Garten has several slaves kitchen elves that do all this for her, but it’s really not that hard, and it makes life a lot easier.  Any home cook can do it, and feel super clever.

The first step to effective mise en place is reading a recipe thoroughly. I still don’t always do this, but I at least read the ingredients list, and pay attention to words like, chopped, minced, sliced, room temperature. 


most everything is out, the coffee isn't going in this recipe, though.
The second step is to pull out all your ingredients, although maybe first, while you are reading the recipe, you should check off (at least mentally) to make sure you have them in your pantry/fridge.  Some things like olive oil, salt, and pepper may be readily accessible near the stove and you don’t necessarily need to move them, but just make sure they are close by.  


chopped and loaded!

Once you have done these two things, you are ready to get moving. I sometimes move straight down the list of ingredients, finely slicing a piece of garlic, chopping tomatoes, cubing chicken, but I generally try to do all like ingredients together. I chop up all my vegetables, measure out all my spices, and pour all my liquids, giving my undivided to each ingredient group one at a time.

It is also important to keep in mind what tools you need to use for each part. Only have one good chopping knife? Do all your veg first and then your raw protein to avoid cross contamination and having to wash in between. The super pliable cutting mats can be useful to put over your cutting board if you are handling raw meat and don’t have a ton of counter space. I sometimes put them over the board, cut up the meat, then remove them and I can move on using the board below for other things without having to wash it right away.  As you finish doing what you need to do to each part, pay attention to what is all going to go to the same place at the same time. If you are going to put your garlic and onion in the pan all at once, they can share a mis en place bowl.  Are you going to add something to something else eventually? Make sure it is in a large enough bowl so you don’t get halfway through pouring and have an, “Oh shit! Splat!” moment.  

 I try to clean up as much as possible as I move along, and I believe it is critical. As long as you are not in a super rush, I suggest cleaning up between prep and cooking, or, getting one of your eaters to start cleaning up while you start cooking.  

Other important components/tips for getting your shit together mis en place:
  •         Removing lids and wrappers before you start cooking. Fancy bottles of olive oil are a notorious pain in the ass. I also get irritated by things that when you remove the lid, there is another foil wrapper. Don’t feel bad if you end up violently puncturing said foil wrapper, rage against the packaging is always OK in the kitchen!
  •         Uncork bottles of wine. Better yet, buy screw tops!
  •          Baking? Take butter/eggs out of the fridge several hours before you start so they are room temp.
  •         Buy a garlic press, trust me.
  •        Don’t be afraid to pay a little extra for cheese that is already grate or veggies that are already sliced and washed---especially if you are cooking for a crowd, or, just trying to get some chow on the table after work.
  •          When the can opener stops working, buy a new one. Don’t f&*% around. Of course, open all canned goods and drain/rinse as appropriate prior to beginning to cook.
  •  Target sells little plastic colanders in the dollar section that hold about 2 cups of anything--- beans that need to be drained, fruits and veggies that need to be rinsed--- buy a few of these!
  •          Invest in more than one rubber spatula. Williams Sonoma always marks the seasonal color ones down and they are top quality, or, just  go to Ikea.
  •         I keep disposable paper bowls around that I sometime use as ingredients holders just to cut back on clean up. I try to avoid this, go green, but for messy ingredients, they can be very helpful.
Last night, I made something that having my mis en place applied to beautifully. Having all my veggies chopped, chicken cubed, cans opened, and seasoning out made this meal even easier than it already was. 

I wanted something homey and full of veg. I am also getting ready to move in about 6 weeks, so I am trying to pick stuff from my pantry that I already have and can use up. I have tons of spices from my trip to Turkey and although most are still vacuum sealed, I knew I had some open chicken seasoning that needed to be used up. Spices are actually not difficult to move, but I had noticed the canister the other day, and was craving something of the Mediterranean persuasion.  I stopped at the terminal on the way home and picked up $1 bags of red peppers and eggplants, as well as a red onion and a lb of boneless, skinless chicken breasts. 


Veg in the pan, ready to tan!
I decided to roast the veg and add them to the stew last minute because why not? I love roasted eggplant and I didn't want to simmer the veg to death. It also made cooking easier because once I had browned the chicken, I was done with any pan frying and I just had to stick the pan of vegetables in the oven while I finished up the sauce and the chicken. Once the sauce was made, the chicken put back in it to cook through, and the veg in the oven, I had about 15 minutes to CTFO. 

This was delicious and I would make it again. I had a carb heavy day so I skipped a starch, like cous cous or crusty bread, but an accompanying grain would've been tasty. I forgot to pick up feta, so I finished it off with some Pecorino Romano and a drizzle of olive oil. 


Mediterranean Chicken Stew (approx 4 servings)


1 red pepper, roughly chopped

1 eggplant, chopped into 1 in cubes
2 cloves of garlic, minced
1 red onion, chopped
1 can crushed tomatoes
1 cup white wine
1 lb chicken (I used boneless skinless breasts, but thighs would be good, or anything bone in)
2 tbs turkish chicken spice
1 tsp red pepper flakes
olive oil
salt and pepper

Preheat oven to 400 degrees. Chop and prepare vegetables.  Toss the vegetables with olive oil and season with salt and pepper. Spread over large baking sheet, but don't put it in the oven yet, set it aside.  

If using boneless, skinless breasts, cut into 1 1/2 in cubes. Season generously with salt and pepper and chicken spice. Heat about 1/4 cup of olive oil in skillet over med high heat. Place chicken in pan and stir ~ every 2 minutes, browning it on all sides. Once brown, remove chicken from pan and set aside.


Add onions to the same pan you just cooked the chicken in and season with salt and pepper. Add more oil if necessary.  Once onions begin to brown, add garlic and red pepper flakes, and sautee for about 30 more seconds. Deglaze the pan with the wine, allowing the alcohol to cook off, simmering for about a minute. Add the tomatoes.  Bring sauce to a simmer and place the chicken back in the pan.  Turn the heat to med-low, cover the pan, and put the vegetables in the oven. 


Sauce pool ready for the chicken to dive back in.
Allow the chicken to simmer and the vegetables to roast for about 15-20 minutes. When the vegetables are done, add them to the chicken and the sauce and stir. Let the stew sit for about 5 minutes over low heat to let the sauce seep in. 


Serve stew over top cous cous, or with crusty bread, or by itself with a sprinkle of feta or hard, sharp cheese on top and a drizzle of olive oil. 


om nom nom nom nom


Monday, April 8, 2013

Darr Caesar


Caesar salad is a pretty straightforward food, or at least not one that I would immediately think deserved its own article.  To be honest, the first thing that pops into my head when someone says Caesar salad is a McSalad Shaker. I loved them.  I guess they came out sometime when I was in middle school, and naturally I was easily hooked on creamy dressing and salty shreds of cheese served in a plastic cup.    I think I liked them so much because they were so different than what I was used to in terms of salad. At that point, my twelve year old palette did not fully appreciate the childhood of homemade vinaigrette and fresh croutons, and the novelty of “shaking” my salad overtook any of the culinary merit possessed by the salads I ate at home.

At some point I started reading the nutrition labels on the packets of creamy Caesar and realized that I could not continue my intake of McDonald’s salads if I wanted to live to the age of thirty.  It also helped that good old Ronald discontinued them-- guess he knew what was good for me, too.    Yes, I know there is always a fat-free Italian option, or a lower calorie balsamic, but frankly, they taste like shit.  Furthermore, if you are eating a fast food salad, you need an opaque dressing to hide the sad, lifelessness of the actual salad.   

When I make Caesar salad now, I like to make what is known as “Darr Caesar.” This is the Caesar salad I grew up on at family dinners, full of garlic, sharp cheese, and richness stemming from origins devoid of mayonnaise, chemicals, and artificial flavors.   My mother taught me how to make this, and I think I've got it down.  I would serve this to anyone, even a picky eater.  If it’s “too much” for them, they are weak.


Darr Caesar Salad (serves 4)

Croutons

Baguette, cut up into ½ inch cubes
¼ cup olive oil
Salt & Pepper

How many croutons you make it up to you. I used about 7 inches of baguette for 4 people. I sliced it in half, then cut it into 4 spears lengthwise, and cut up the croutons from there. Toss the croutons with the olive oil, salt, and pepper, spread them out on a baking sheet, and put them in a 400 degree oven for about 12 - 15 minutes.  Watch them, however, as everyone’s oven is a little different. You also may want to give them a stir part-way through. Mine came out with a slight chew at 12 minutes, which I like.

Dressing

1 clove of garlic, minced (put it through a garlic press if you have one)
½ cup olive oil
Juice of half a lemon
½ tsp of black pepper
Couple shakes of Worchestire sauce (optional)

Whisk all these ingredients together.  You may want to add more lemon juice, depending on how juicy the lemon is. I might hold off until the end, however, as you can always add it after you toss the salad.

The Rest of the Salad

3 hearts of romaine, chopped, washed, and dried
1 cup shredded Pecorino Romano (I love Pecorino de Cacio from Whole Foods, always have a wedge in the fridge)

Toss all the ingredients together in a large bowl.  I usually need to add a little more olive oil, lemon juice, or a few extra dashes of Worchestire sauce. It all depends, just add what you like to taste, and keep in mind you can always add more, but you can’t take away. I always add some fresh cracked black pepper, too.  Be prepared to taste garlic possibly even after you brush your teeth the night you eat this, and possibly even detect hints of it the next morning. 


Tuesday, April 2, 2013

Pan Frying 101

When I cook, I tend to do a lot of things in a big pot or 9x13 pan. I often default to this because if I am entertaining, I want to spend time entertaining and not stressing about last minute searing or pan sauce. If I am just cooking for myself, I do a lot of things that take about 15 minutes max to prep a cook-- a piece of filet, an omelet, stir-fry---but once there are numbers involved I start thinking about what I can prep ahead and just stick in the oven, or stir occasionally.   

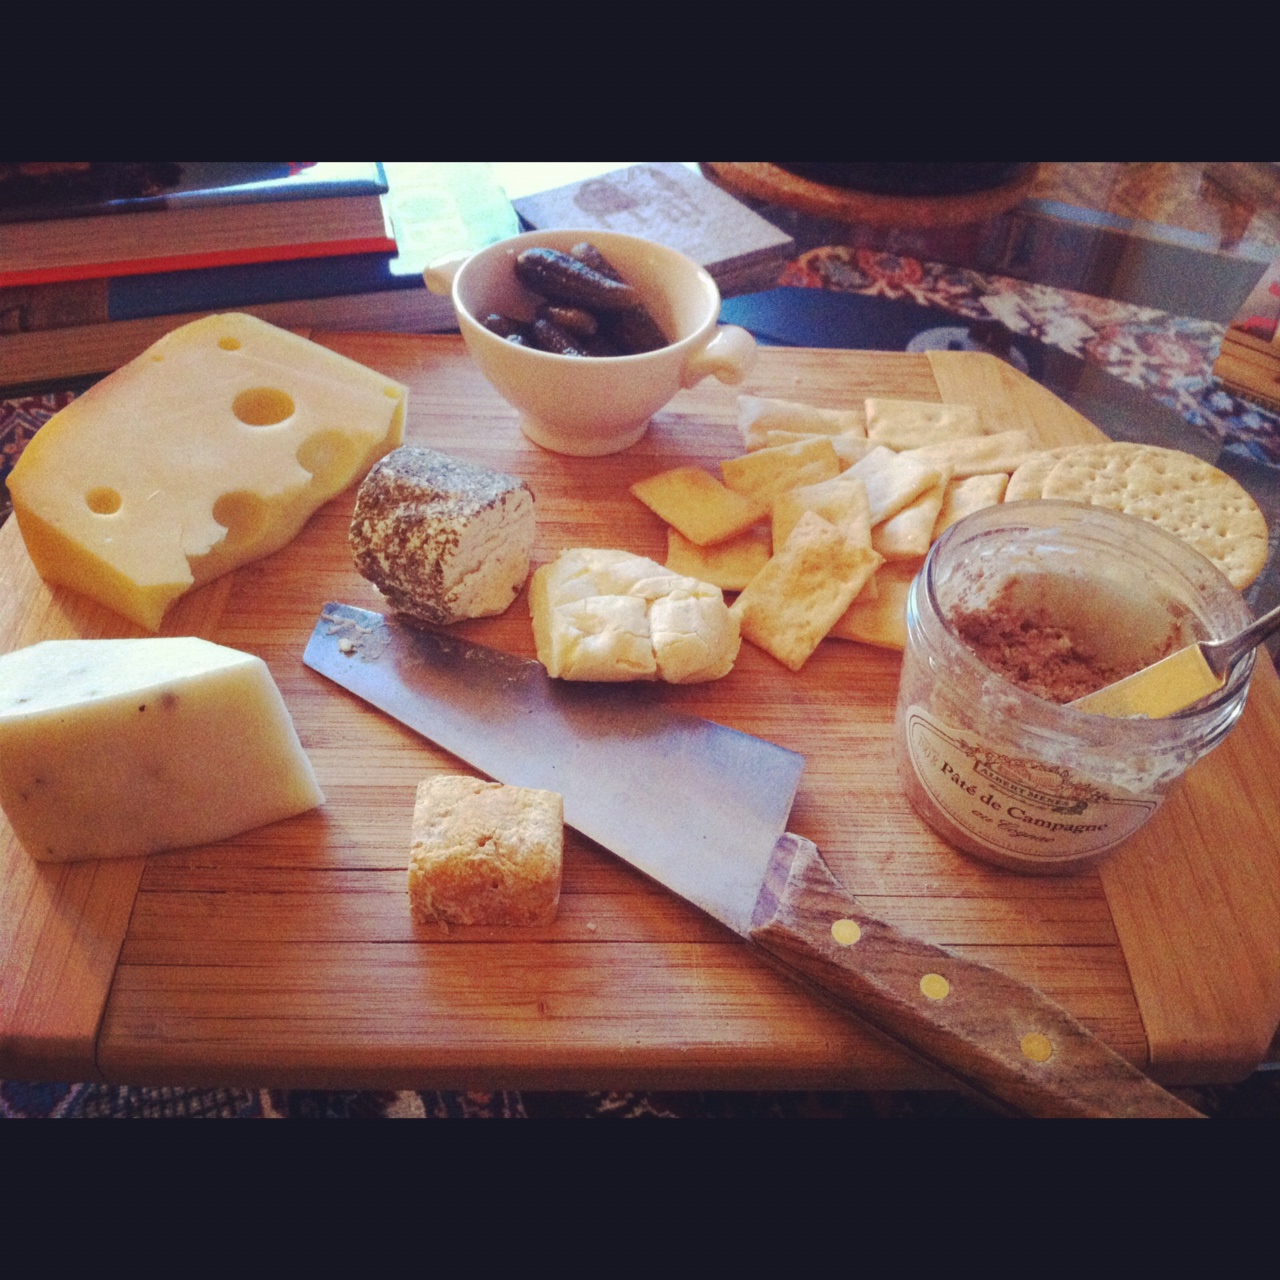
If you're too busy doing last minute prep, you miss chz plates like this!
The thing is, some of the best flavors come from pan frying. One of my favorite meals from my childhood is pork or chicken cutlets, covered in Italian breadcrumbs, pan-fried (with a side of applesauce).  My mother would make them once every couple weeks and she always says, "it made everyone happy". 

I also have lots of bad memories of pan-frying from when I was learning to cook, college in particular.  Lots of smells of burning, cutlets sticking to and ultimately ruining pans, and biting into raw centers. I've learned however, that as long as you use ENOUGH oil/butter, shake off the excess flour/egg/breadcrumbs, keep the pan hot---but not too hot, pan-frying doesn't have to be so scary, and the results are delicious!


I saw this recipe in Saveur and knew I had to make it.  The picture was beautiful, displaying perfect golden brown crust, and the accompanying article talked about eating this at some cozy restaurant in Switzerland, so I was easily sold. It just seemed so comforting, and with the awful chill and grayness that dominated last week, it was the perfect weeknight treat. 

Beautiful Gold Crust!

The recipe in Saveur said 4 oz of meat per person, so I got a pound of pork chops for 4 people.  The butcher sliced them in half for me, to make them thinner and more like a cutlet, and I stamped them out from there. I don't have a meat tenderizer, so I just beat the shit out of them with a rolling pin (I put the meat between wax paper). I got them down to about a 1/4 of an inch each.  I suggest doing this after a long day at work if you're looking for therapy that doesn't have a $30 co-pay.

Ham and Chz Goodness


Cordon Bleu, serves 4

1 lb. pork cutlets (or chicken)
4 slices Emmantaler cheese
4 piece of thinly sliced ham
1 cup flour
1 cup panko bread crumbs
2 eggs, beaten
1/2 cup oil
1/2 stick butter

Stamp out cutlets to 1/4 inch thick. Season cutlets generously with salt and pepper. Place cheese and ham in middle of cutlet and roll it up. You could just place the ham and cheese on one side, then fold the cutlet in half; or put the ham and cheese in the center, and fold the cutlet it thirds like a bath towel. Set up your flour, beaten eggs, and bread crumbs in three plates or bowls. Coat the cutlet in flour, and shake off excess. Then, dip the cutlet it the egg, and shake off the excess again. Finally, coat the egged and floured cutlet (sort of like tarred and feathered) in bread crumbs.  It is important to shake off the excess at all stages, but also make sure you are evenly coating the whole piece of meat with all parts.  I did all of this ahead of time before I went over to S's house so I wouldn't make a total mess of her kitchen.

Heat up the butter and oil in a frying pan over med-high heat. You know your stovetop better than I do, so use you judgement on what temp level you need to set to get the oil/butter hot enough to fry in. I test the heat by dipping a corner of whatever I'm frying into the oil as I think it's ready. When I hear the crackle, I know it's ready. Fry the cutlets for about 5 minutes on each side. I went back and flipped them again after the first 5 on each side to even up the browning because the heat wasn't exactly distributed through the pan and both sides ended up with a side that got less browned. Frying probably took about 12-14 minutes. 

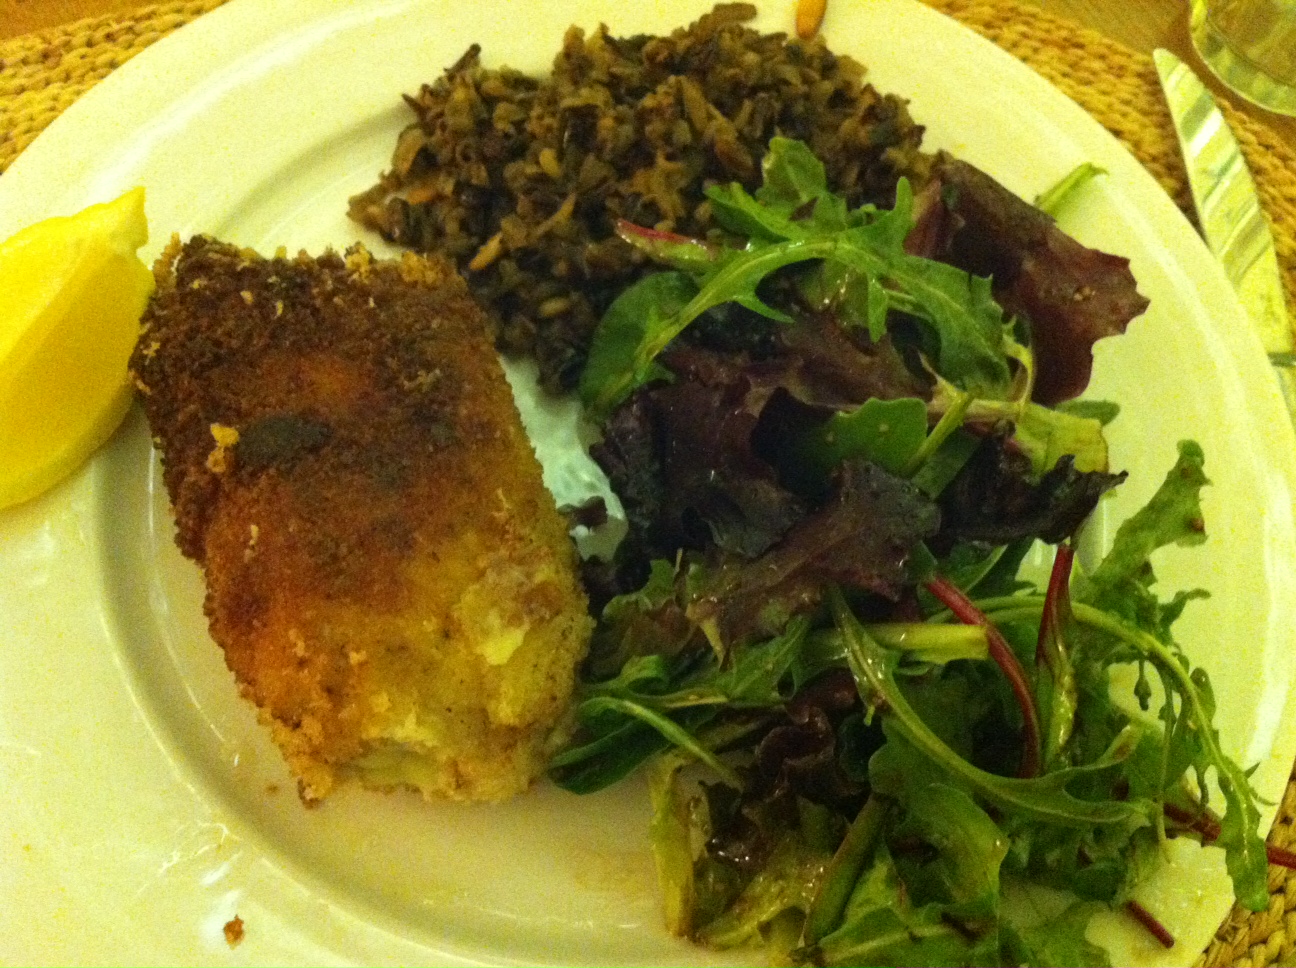
Serve the cutlets with a lemon wedge.  We served ours with a nice green salad and a wild rice pilaf. T fashioned the salad and S made the pilaf. The pilaf was fantastic, and the simple greens complemented the entire meal perfectly. 

The Final Plate!

Thursday, March 21, 2013

Beef Stout Stew


I was lucky enough to celebrate my first St. Patrick’s day in about five years this past weekend in Philadelphia. Although I have loved traveling to exotic locations like Norfolk, VA and watching or playing in women’s lacrosse games these past five years while all my “normal” friends got to don green and go cray, I had high expectations for this weekend’s festivities.   Thank you, City of Philadelphia for not disappointing.

I’m pretty sure every meal I consumed from Friday – Sunday night had some alcoholic component. Whether it was the Irish coffee blondies I snacked on, or the actual Irish coffee I poured myself Saturday morning, I felt obligated to pay homage to my Irish heritage by including booze in my food and beverage intake at all times.  Wary of completely forgoing food for drink in my cultural pursuit, I eyed up St. Patrick’s Day recipes all week and saw dozens for stout stew.

As luck would have it, my college friend, B, came to town and left me with a 4-pack of some powerful stout, Absolut Truth. I decided on a Lamb Stout Stew recipe from Martha Stewart, and ended up making Beef Stout stew because Whole Foods was out of lamb. I also did not follow Martha’s recipe exactly, sorry BBG, but used it as a guide.


This stew was great because it all happened in one pot/one bowl. The only chopping I had to do was trimming some of the fat off the meat and slicing the garlic. I bought a pack of sliced baby bellas to throw in at the end, but that never happened. I think carrots would be good in this as well. I added the potatoes at the beginning, sort of afraid they would get mushy after 2 hrs in the oven, but they were fine!


I really would like to try this with lamb. I would also really like it if someone would buy me a 5 qt dutch oven (in some shade of bright blue, preferably) so I can use it for recipes like this.  The stew could be served over egg noodles, or just with hunks of brown bread. We ended up putting it over Colcannon, because T&C had made a huge pot of it for a party they hosted Saturday, and there was a lot left. Plain mash would be delightful as well!


Sláinte!

Beef Stout Stew  (at least 5 hearty portions)

2 lbs stew beef
¼ cup flour
1 can tomato paste
1 bag frozen pearl onions, thawed
1 lb new potatoes (the cute little golden ones)
1 bag green peas (I like the petit pois), thawed
1 bottle stout beer
2 cups beef broth
6 cloves garlic, sliced
1 tbs dried thyme
2 bay leaves

Preheat oven to 350. Trim excess fat from beef and season beef with salt and pepper. Toss beef with flour, and then mix in entire can of tomato paste.  Put beef mixture in Dutch oven and pour bottle of stout and beef broth over top.  Add garlic, thyme, bay leaves, potatoes and onions, and stir. Bring to a boil over med-high heat, stirring occasionally.  Once a boil has been reached, cover, and bake in oven for at least 2 hours, or until fork tender. Serve over mashed potatoes, egg noodles, or with hunks of brown bread.

Wednesday, March 13, 2013

Miami & Magadalenas


My recent holiday in Miami has ignited my gastronomic fervor. I love to cook, and do so as often as possible, but my diet week throughout the week is relatively simply--- cereal, omelettes  salads, yogurt, cheese, wine, dried fruit, and pizza.  Often on vacation I grow wary of dining out, my mother cited a craving for “simple food” as we browsed airport dining options pre-return flight, but on this trip, I experienced so many different flavors, it really didn’t grow old.

For starters, headed into this trip, I did not know that there was a significant Orthodox Jewish population in Miami Beach.  I was pleased to discover this, as I am a well-document lover of “Jew Food”, and have been known to make an effort to celebrate Jewish holidays during the year through ethnic meals.  Our best lunch of the trip was at a kosher hot dog shop, House of Dog.  M, my brother, ordered a burger topped with guac and chili. My mother and I both went with dogs, mais oui, mine topped with fried onions, peppers, kraut and buffalo sauce, aka the “Dracula” dog, and hers was smothered in tradition Reuben toppings---pastrami, kraut, and Russian dressing.   We picked up a ton of chocolate as gifts for family and friends at a kosher chocolate shop, Schokolade, and also enjoyed breakfast one morning at a kosher café. I know it’s not that bad for you, but a bagel with lox and cream cheese is one of my favorite “treat” breakfasts.

Dulce de Leche pastry & a Cortadito
CVS Baked Good Treasure
Nutty Magdalenas

Beach Snack of choice for the week

The cuisine of the week, however, was Latin (duh).  If I could start/finish each and every meal with a Cortadito, Cuban coffee with a bit of milk and sugar, I would be set. I swear-- my productivity would increase ten-fold. I tried to replicate it at La Colombe Monday morning by ordering a double espresso with a little bit of steamed milk, but it just wasn’t the same. There was also an abundance of delicious pastry.

I loved all the puff pastries stuffed with dulce de leche and topped with guava jelly, but my favorite did not come from behind the glass of some cute little Cuban bakery. It came from the shelves of CVS.


These little muffins, with 100% butter as the package proudly states, were delicious. I brought back 4 packages---two as gifts and two for my roommate and myself. They reminded me of Magdalenas, denser and cakier, but very similar. I give myself a get out of jail free car during vacation in terms of eating so I snacked on these all week.  I did the same thing traveling in Spain, purchasing bag after bag of Magdalenas from the nearest food store.

A couple weeks ago, I bookmarked a recipe David Lebovitz posted for nutty Magdalenas and after trying so many pastries, especially the muffins, I was more than inspired to give baking some sort of cakey-delicious muffin a go. These were fantastic!


Next time, I will definitely cut the sugar, perhaps by a whole 1/3 cup. They weren’t too sweet, but the amount of sugar just wasn’t really necessary. I would also consider using light olive oil to cut the calories a little, but use whatever you want. After indulging in buttery baked goods all week, the olive oil flavor really stood out. Of course, these guys also pack a load of nuttiness. I used ground almonds in the flour mixture, as I normally don’t have hazelnuts of hand.  If you really like almond cake, a splash of almond extract may be good in these as well, or maybe some cinnamon if you’re into that. I would make the recipe as is first, though, and then go from there, because you will definitely want to make them more than once. I cooked them about 5 minutes longer than the listed time, and they could have benefited from a few extra minutes… don’t forget to rotate your pans!


Sunday, March 3, 2013

Brunch Eggs

Anyone that has been to a breakfast or brunch hosted by my sister, C, my mother, or I, has probably had brunch eggs. As a family, we have had them every year on Christmas morning since I can remember Christmas, and they make special appearances throughout the year as well.  The first morning I ever made them on my own was the day of my college graduation, a day my friends and I needed all the moral support we could to face the reality of that day. They are always a hit, only a total weirdo wouldn’t appreciate such a delightful combination of bacon, egg, and cheese, easy to make, and can be put together the night before.
Brunch eggs can also be made vegetarian.  Omit the bacon and add in some steamed spinach and sautéed mushroom, chopped roasted red pepper, or just keep it cheese and egg. Soy sausage crumble would also make a tasty substitute if you’re into that (not for everyone, I happen to enjoy it from time to time).  For a real meat lover, you could use regular sausage in addition to the bacon.  If you are into cheese, we used nice extra sharp Irish cheddar this past Christmas and it was quite the treat.
I made brunch eggs this weekend for a birthday brunch of sorts hosted for my friend, K. I did not prepare the casserole the night before, as I only volunteered to host the brunch the night before, but was able to pull it off with a questionable Saturday morning BAC after a Friday evening of birthday celebrating.   An afternoon of drinking proceeded the brunch, so it was important we had a meal in our bellies before we continued the festivities.
I rounded out the brunch spread with some bagels and cream cheese, fruit salad, and blueberry muffins.  The past couple years on Christmas morning I have managed to disappoint my family with homemade blueberry muffins, rather than the Duncan Heinz box mix we all know and love, so I kept it simple Saturday with the box mix; nothing like canned blueberries and streusel topping.  I also set up a Bloody Mary bar, and few bottles of champers were popped and mixed with some OJ. We’re all adults, here.

Part of the spread!

Such a fabulous weekend and I’m so glad I could share this joy of bacon, egg, and cheese with some wonderful friends, new and old. Happy Birthday, K!

Eggs before they went into the oven


Brunch Eggs
1 lb of bacon
Package of xtra sharp shredded cheddar cheese
Package of swiss cheese
Cheap, squishy white sandwich bread
6 eggs
3 cups milk
Salt and pepper
Chop the bacon into thin slices, about a ¼ inch thick. In a large pan, fry the bacon until crisp. Be careful, because it seems to go nowhere at first, but then all of the sudden it’ll be burnt if you don’t watch it and you’ll need to start over and it will smell awful. Use a slotted spoon to remove the bacon from the pan and put it on a plate with a paper towel.
Beat the eggs lightly, and add the milk and whisk until combined. Add ¼ tsp of salt and cracked black pepper.
Trim the crust from the sandwich bread. How many slices you use depends on how big the slices are, but you need enough to make a single layer on the bottom of a 9x13 pan. Line the bottom of a greased, 9x13 baking dish with the bread. Layer the Swiss cheese over the bread, then the shredded cheddar cheese, and finally the bacon. Pour the egg and milk over everything. Bake for 45 min to an hour in a 350o oven. When the casserole is puffed up, browned, and bubbling around the edges, it’s done.
You know how I know it's done? It's puffy.