Wednesday, July 17, 2013

Clam Spaghetti

When I think of clam spaghetti, I don’t think of 6-8 clams neatly arranged a delicate bed of pasta with a gentle sprinkle of chopped parsley and red pepper flakes.  I think of sitting at the kid’s table in my Auntie Clare’s basement, a big plate of pasta, a pile of chopped clams swimming in butter, white wine, and parsley, with a heaping spoonful of Reggiano cheese on top.  To me, clam spaghetti is comfort food, a Superior Ave special that never fails to leave me with a fully belly and gunning for seconds, or thirds.

Every once in a while I find myself at an Italian restaurant and I see Spaghetti Alle Vongole on the menu. Nostalgic for a plate of Auntie Clare’s buttery, clammy-goodness, I’ll order it. Time after time, I find myself disappointed. I’m sorry, pretty as those clam shells are, I’d rather have the chopped, canned ones that Auntie uses. A couple times, the clams have been gritty-blech. The clam to pasta ratio is always completely out of whack, too. I want Clam Spaghetti, not a pound of spaghetti with a brief, clam opener. Sure, each plate ends with the delectable sauce to be sopped up by pieces of bread, always something to look forward to, but the main event just never seems to measure up. 

I decided to make Clam Spaghetti for S and me last night because I think we were both in the mood for/of need of some comfort food. I have been eating far too many bowls of cereal and hummus/peanut butter/carrot dinners, so it was time to cook.  S had talked about delicious smoked clams they concocted the previous weekend at the shore so I had clams and seafood on my mind. Grilling a piece of fish seemed boring and pasta is such a treat—I knew clam spaghetti would hit the spot.

Pretty Sauce
I was semi-concerned about finding canned clams at my usual haunts on my walk home from the gym. I didn’t think Whole Foods would have them, but I was pretty sure Dibruno might. I ran some recon at lunch and DiBruno did not have canned, I believe they were out of stock, but they DID have FRESH chopped clams.  I told the counter attendant I would be back.  Post-gym I picked up a pound of the chopped clams, some fresh linguine, and green onion. As disturbing as reading the register when checking out at DiBruno can be at times, the comfort theme (ie. convenience shopping) began then and there---worth it.

Fresh chopped clams!
Auntie Clare sent me her general recipe a while back. I have made it a few times since, and each time had slightly different results. I was curious to see how the fresh clams would play out in terms of adding to the flavor.  I wanted to keep it light, too.  Less buttery-goodness--- more seafood, wine, lemony-goodness!

I think the fresh clams really made this dish. We could taste the ocean.  Although I actually like the texture of the canned clams, the fresh clams were meaty and juicy and on a different level. Also, I am completely aware a real Italian would NEVER add cheese to seafood, but I just had to do it. I took a couple bites without the cheese, and they were delicious, but I threw on some handfuls of Pecorino Roman after that in honor of Auntie Clare. S, a REAL Italian, tried it with the cheese and said she enjoyed it, but it didn't need it.  Using fresh pasta, a treat, also makes a big difference. It was so light, and it soaks up the sauce in a way dry pasta wouldn't quite be able to.

Fresh pasta treat


Clammy comfort (oxymoron?)
Clam Spaghetti makes 2 hearty main course servings

1 lb fresh, chopped clams
3 tbs of butter
3 tbs of olive oil
2 cloves garlic, chopped
1 tsp red pepper flakes
4 green onions, chopped (I used the whole onion, all white and green parts)
¾ cup white wine
1 cup chicken stock
~ ½ cup clam broth (I just used all the liquid that the clams were in)
Juice of one lemon
½ cup chopped parsley
Salt and pepper to taste
Fresh Spaghetti or Linguine

Drain the clams and preserve the liquid to use in the sauce. Heat 2 tbs of butter and all of the oil over med-high heat. Add the garlic and red pepper flakes and allow to sauté for about a minute, careful not to burn the garlic--doing this will allow the pepper to infuse the oil and give the dish the heat it needs later.

Add the chopped green onion and sauté for 2-3 minutes until soft, and season with salt and pepper. Add the wine, the stock, the clam broth, and lemon juice and bring to a simmer.  Allow the liquid to reduce by about half, and taste it for flavor.  I often add another splash of wine or chicken stock at this point.  If the clam flavor is way too strong for you, add the chicken stock.  If you think it needs a bit more acidity, add the wine.  My Auntie says, “it will taste strong, but it works once you add the clams”. 

Add the clams and chopped parsley and let it cook for about 2 minutes. Do not overcook.  Taste the sauce again.  Like I added the chicken broth or wine earlier, I sometimes find at this point it needs the other tbs of butter or a bit more lemon juice at this point. The butter will add creaminess and the lemon sharpens the flavor.

Serve over pasta and don’t hesitate to put a bowl of grated Parmesan or Romano on the table (you never know who might like it).  


PS. Make sure you have  some crusty bread around for the sauce!

Monday, July 8, 2013

Sangria

Signature cocktails are fun for entertaining.  They can be seasonal, sentimental, or perhaps they are just the drink that has somehow become your default cocktail bar order or post-work libation.

In college, as shameful as it is to admit, my signature “cocktail” (beside BL bottles) was a Jaeger Bomb. Yup. I accumulated quite the collection of Jaeger bottles received as gifts from age 18-21. Now, my friends give it to me as a sort of gag gift (hehe, puns!).

In a post-college trip to Italy with J, I discovered Aperol.  J and I were walking around the piazza in Como in search of refreshment and could not miss the neon cocktail that graced nearly every table. We ordered 2 and the rest is history. The “Spritz” became a family favorite, and my method of not measuring anything requires that I am always the one mixing up round after round because others just don’t quite get it right and unfortunately, I can’t pass off a specific recipe. Quel dommage.

My mother’s side of the family has a variety of signature cocktails. Gin and tonics, gin martinis (always with olives/cocktail onions and a twist)---as well as jugs of fruity red sangria that make steady appearances during the summer months.   My uncle is usually the one to make it, and it always packs a punch. I don’t know at what point I transitioned from just being allowed to eat the leftover boozy fruit to actively pouring myself a glass or three---I highly doubt anyone gave me permission to upgrade my alcohol scavenger status, but as an adult, I have adopted sangria as a signature cocktail of sorts of my own.


favorite post-work libation - get it from my momma


The great thing about sangria is that it is not as fussy as some other cocktails with multiple components can be. All you need to set up is the jug of sang itself, a big spoon for scooping out the fruit, some ice, and possibly some club soda for mixing---no muddling or measuring required. I think it is served best in larger cups. I served it insmall cups last time and it was difficult to leave room for the booze, or a splash of club soda, once the ice and fruit were in the cup.


it might look a little cloudy--- do not worry!


There is a lot of bad sangria out there. I'm always wary of a non-ethnic restaurant that advertises a sangria special, and I've had few bad house party sangria experiences (typically with white sangria). I think fresh squeezed OJ makes a difference, as well as letting it sit as long as possible, overnight if you can plan far enough in advance. I always add a couple tbs of sugar, and every once in a while, a shot or two of triple sec. I think the added sweet depends on what wine you start with. Always sweeten to taste, which means you actually have to taste it before you serve it, and remember you can always add more but not take away. I sweeten after it has sat for a bit. 


best served cold on a hot day

Red Sangria

Two Bottles of Fruity Red Wine* 

1 cup brandy

1 cup fresh squeezed OJ

1-2 tbs sugar, to taste

1 apple, chopped into 1/2 in pieces

1 orange, chopped into 1/2 in pieces

1 lemon, sliced into thin 1/2 circles

1 lime, sliced into thin 1/2 circles

1-2 shots triple sec, to taste 


Chop up all the fruit and put it in the bottom of a large pitcher. 

Add the wine, brandy, OJ, sugar and stir until sugar is dissolved. Allow the sangria to sit in the fridge for 3-4 hours, and taste it for sweetness/booziness. Add sugar by the tbs, or shots of triple sec to taste, stirring well and tasting in between. Let the sangria sit for 3-4 more hours. If doing overnight, just try the sangria before serving for sweetness (or when you wake up at 8 am, whatever your palette fancies in the am).  Serve over ice with a splash of club soda (optional). 

*I don't feel you need to use "good" wine for sangria.  If something tastes "good enough" straight out of the bottle, it's going to taste "great" once you add all the fruit and brandy. I generally use a combination of Cabernet, Merlot, and maybe even Malbec. In fact, I really just use whatever is one sale, which is often of the Barefoot/Jacob's Creek/Gallo variety. 

Monday, July 1, 2013

Buttermilk Pancakes

Pancakes are an easy breakfast food to develop a love-hate relationship with. For one, the first couple times you make them, you are bound to attempt to flip them too early.  Then, after you have rearranged the batter and splatter into coherent blobs, you will likely cook them for too long on the other side, and they will then be burnt. It is also easy to skimp on the butter and oil that should be applied to the pan LIBERALLY, resulting in a residual mess that burns to a char and stick to the final batches mercilessly.

Most recent batch of blueberry guys
However, once you get the hang of it, and find a pancake recipe you like, things get easier. Confident in your mastery of the hot stack, you may even be tempted to venture into the realm of healthy pancakes---made from scratch! After mastering that mix that was in your Christmas stocking, and had a nightmare about the nutrition label, you become obsessed with adding protein, cutting a couple grams of fat, and infusing some whole grains.  Why not substitute the eggs with low-fat yogurt? Gluten-free flour blend? Sure!
Healthy(ish) pumpkin pancakes

After forcing your hung-over body to suffer through a few Sunday morning rounds of gummy, lackluster, healthy pancakes, you finally sober up and reach for your copy of Joy of Cooking.  The page with the recipe for Buttermilk Pancakes calls your name and begs for batter stains and grease spots.   Exhausted, and hungry, you collapse into its arms. Voila. It’s love.

Buttermilk pancakes

I believe the key to great pancakes is using a combination of oil and butter to fry them in, and lots of it. If you are worried about fat, don’t eat these every weekend, and for God’s sake don’t put more butter on them when you add syrup!  

I was inspired to make these most recently when S and C were describing a breakfast they had down the shore at Gilchrist’s in Atlantic City. Diner/breakfast spot pancakes are such a treat. They are light and fluffy, yet crisp around the edges. They are never under cooked,  and have a nice brown on them that provides a warm, toasty edge.  A good diner is always going to have a competitive advantage with a huge flat top to cook, grease supplies, and the perennial all-star that has been flipping flapjacks every morning for 30 years, but you can do pretty well for yourself at home and avoid a 2 hour wait.

Best breakfast spot in Margate

Buttermilk Pancakes (adapted from Joy of Cooking) 4 hearty servings

Lots of butter and canola oil for frying
2 ¼ cups of flour


4 ½ tbs sugar
1 ½ tsp baking powder
¾ tsp of baking soda
1 ½ tsp salt
2 ¼ cups of buttermilk
4 ½ tbs butter, melted
3 eggs
1 tsp vanilla extract

Have the butter cut up into tabs and the oil available near to where you are frying. I use about 1 tbs butter to a tbs of oil per batch (although I don’t always need to re-up between batches). Use your judgment, just don’t be stingy.

Mix all the dry ingredients together in a large bowl.  Lightly beat the eggs in the bottom of another, and mix in the rest of the wet ingredients, until just combined. Add the wet ingredients to the dry, and again, mix until just combined. 

Heat the butter and the oil over med-high heat in the skillet. Once it’s melted, and foaming just a bit, add the batter in ¼ cup portions. Cook on one side until bubbles form on the surface, and the edges have browned a little. Watch the heat, and before you flip, you may consider lowering it to medium.

Cook through on the second side, which will likely have a shorter cooking time than the first. Make sure you manage the temperature of the pan. I generally alternate between medium and medium high heat.


Serve sprinkled with powdered sugar or warm maple syrup. 

Tuesday, May 7, 2013

Homemade Donuts


Similar to how we treat domesticated animals, we, as humans, like to reward ourselves with treats. Treat rewards are particularly relevant in managing children’s behavior and perhaps this is why I associate donuts with childhood.  Sit still for at least 50% of Mass on Sunday? Post-liturgy basement donut sale! Make it to morning swim practice over summer vacation without a meltdown? Dunkin Donuts is conveniently on the way home and has a drive through. No shoes, no shirts, no problems

The fall starting fourth grade was a donut heavy one as I managed to fracture my right arm and two fingers one after the other. My mother treated me to a coffee coolata and strawberry frosted (WITH sprinkles) post-orthopedist appointments that were aplenty that fall.  The subsequent sugar rush soothed my emotions as I was completely torn up having to miss out on all those Saturday afternoons in Umbros and a neon cotton t-shirt with some international team name emblazoned across the back (I think I would’ve been a member of the “China” squad that fall).


My  “adult” awareness of what constitutes a nutritional breakfast has decreased my donut consumption overall, as I walk by Dunkin Donuts on the reg without giving second thought to Barbie pink icing.  Food trends, however, have made donuts more prevalent than ever, as boutique donut purveyors beyond national chains churn out “gourmet” varieties that include exotic spices and booze infused fillings.  In Philadelphia we can enjoy Federal Donuts, the new Beiler’s Bakery stall in the Terminal, and an assortment of South Philly bakeries.  

I’ve always been hesitant to try making donuts because deep frying can really stink up a kitchen/apartment. I was sold on the idea, however, after reading a recent feature in Saveur magazine. The recipes were simple, the instructions clear. If I could get 2” of canola oil to 350 degrees in a 6-qt sauce pan, I could do it. I know places like Beiler’s will always hold a competitive advantage until I acquire bathtub size vats of glaze and an industrial deep-fryer and apparate them up the four steep flights of stairs to my apartment, but I was quite pleased with the results, and homemade donuts will be making a debut on the Mother’s Day menu this weekend!

I chose an Old-Fashioned Spiced Sour Cream recipe from the Saveur feature because I had all the ingredients on hand for the dough and the glaze.  Actually, I didn't have All Spice, but I did have ground Mace, so I used a few dashes of that instead.  Also, sour cream donuts are generally amazing, and I was not ready to take to the time to make a yeast-raised variety.   I cut the recipe by 2/3 and got 8 smallish (2 ½- 3”) donuts, more than enough for my purposes.


Pre-Glazing.

The spice really came through in the glaze, but I experimented with just powdered sugar, and that was really good, too. You could also use a plain vanilla glaze if you don’t have the spices (I have a lot of spices leftover from Lebkuchen baking at Christmas). I got a great crust on the batch I made, and they were not cloyingly sweet.  My apartment did sort of smell like McDonald’s after I was done, but nothing some open windows and scented candles couldn’t fix by the time I went to bed.


After the flip.
Getting Puffed and Golden.

I managed fine on my own, but this would be a fun thing to do in a group.  As with all deep frying, there is a lot to keep track of between managing the oil temperature, timing for flipping/rotating, actually forming and preparing whatever you are frying, so if you can divvy up the jobs, more power to the group. I was aided by the stopwatch on my iPhone and a small kitchen where nothing is ever really out sight or reach. 

The Finished Product!

Thursday, May 2, 2013

Strawberry Muffins


There has been a big push over the past couple years to shop and cook seasonally and locally. As I’ve read numerous articles on the subject, browsed restaurant menus littered with names of local creameries and farms, and planned at home menus revolving around root vegetables and baby greens depending on the date, I’ve come to two conclusions:

1.       Shopping and cooking locally is pricey.

2.       Shopping and cooking seasonally is easier, and not so pricey.

Farmer’s markets are the classic, no-brainer outlet for local shopping.   They are an excellent opportunity for local producers to display and sell their wares without a brick and mortar establishment that they likely could not afford/nor have any interest in. Farmer’s markets are also about community--- local shoppers browsing local goods, supporting one another. Who doesn’t feel good helping a neighbor out?  I mean, even if I can’t digitally touch an Amish farmer from Lancaster County via Facebook friendship, I might as well extend a helping hand buy paying $20/lb for their goat milk cheddar.

Farmer's Market in Lyon with my bestie, J.
Don’t get me wrong, I love a good farmer’s market, but I’ve decided I’d much rather turn my consumer focus to driving my menus around seasonal goods, in any venue.  It’s simple economics. When a fruit or vegetable is in season, because it is the correct season for it to grow and flourish, there is much more of it. What happens when supply is in abundance, and a surplus occurs? Prices go down!  Ever pay $5 for a lb of semi-yellow/pink strawberries in the dead of winter just so you could dip them in chocolate and hand feed them to your lover in front of a roaring fire? That same $5 will get you TWO lbs of strawberries in May, and they will be red, and delicious, and taste like candy. You won’t need to slather them in cocoa calories either to enjoy them, so hello hot bod. It’s a win-win.

Probably the best strawberries I ever had. Went back for a 2nd carton.
Furthermore, when you end up with two pounds of delicious strawberries, the gastronomic possibilities seem endless! You can rinse on a handful and enjoy them as is, chop a few up and throw them in your cereal or yogurt, put some in a blender with some rum and sugar….
Or, you can do what I did, and make strawberry muffins.  I stopped at Whole Foods on my way home from work to pick up some regular milk to make yogurt (I usually only keep Soy in my fridge for cereal), and I was greeted in the front of the store by a beautiful display of strawberries (they are just so clever with their product placement there). I couldn’t resist, even though I knew I had a lb of strawberries I had cut up the other day sitting in the fridge, untouched.  

Also in my fridge were a lb of butter, a few glugs of buttermilk, and an opened container of sour cream with approximately one tablespoon missing.  What I had to open an ENTIRE container of sour cream to procure one tbs of the stuff for is beyond me, but I hate waste, and I’m definitely not down to eat sour cream by the spoonful with MDW a few weeks away. I turned to the interwebz for inspiration and decided some of 2 lb pile of sweet, juicy loot would go to a batch of strawberry muffins.  I was also inspired one of my favorite treats, the French Berry Roll from Metropolitan Bakery, which sometimes has whole pieces of strawberry in it.

Do you know the Muffin Man?
These muffins came out very moist, and not too sweet, just how I like them. I ate one right out of the oven with a little butter on it, some jam would’ve been nice, but I was too lazy to get up and get it once I settled down with my muffin and my book. They could be made sweeter with some more sugar, or maybe a swirl of Nutella, or some of that pretty crystallized sugar sprinkled on top, but these worked for my taste.   The strawberries I got are excellent, fragrant, and very strawberry (really looking forward to eating some plain), so their flavor really came through and they aren’t just anonymous pieces of fruit in a muffin.

om nom nom nom

Strawberry Muffins (makes a dozen)

Adapated from Joyful Baker 

Dry Ingredients
2 ¼ cups of flour
1 ½ tsp baking powder
¼ tsp baking soda
½ tsp coarse salt
½ cup light brown sugar
Tsp of lemon zest

Wet Ingredients
2/3 cup sour cream
2 eggs, lightly beaten
½ cup butter, melted and cooled to room temp
½ - 1 cup of buttermilk
1 tbs vanilla extract
1 ½ cups strawberries cut into small pieces

Preheat oven to 350 and line a 12 cup muffin pan with paper liners. Melt the butter and let it cool to room temperature.

In a large bowl, Whisk together the first four dry ingredients, and then add the strawberries. Mix the strawberries gently into the flour mixture so that they are coated with the flour. This will prevent them from sinking to the bottom of the muffins. Mix in the sugar and the lemon zest and stir gently until just combined.

Lightly beat the 2 eggs in the bottom of a medium bowl.  Whisk in the sour cream, and then the melted butter once it is cool. Add the vanilla.  Make sure all ingredients are combined, but do not overbeat.

Add the wet ingredient mixture to the dry and give it a stir. Add the buttermilk as necessary. I found the batter to be really dense and sticky, and added close to a cup of buttermilk.  I would add it about ¼ cup at a time until the batter is still sticky, but definitely wet, with all the dry ingredients incorporated.   If you don’t have buttermilk, regular milk would work, too.

Divide the batter evenly among the muffin cups and bake for 20-25 minutes. Definitely check the muffins at 20, mine needed an extra 5, but it all depends. Once a toothpick inserted into the center comes out clean, they are done. Remove the muffins from the pan and allow to cool on a rack.

You could certainly use yogurt in this recipe rather than sour cream. I always use reduce fat sour cream, and it’s what I had.   Adding a ¼ cup of white sugar would also sweeten them, perhaps if you were serving them to kids, and maybe melting a cup of Nutella and swirling it through the batter would make them more dessert-y.  I think the easiest addition would be a sprinkle of crystallized sugar on top, or maybe some sliced almonds.  If you want to be fancy, easy upgrade to a mixed berry muffin by substituting a portion of the strawberries with blueberries or blackberries. 

Friday, April 26, 2013

Chicken Piccata


Pan sauces are great because they are essentially a one-pot meal. Also, some of the best ones include wine, so I’m naturally inclined towards them.

Switching topics real quick, in my family, we have a “vinegar gene”. A bunch of us really like vinegary, lemony, brine-y foods. Mustard pickle with a side of grilled cheese? Double trips to the pickle bar at our fave Jewish deli? Asking for a pickle if they forgot to put one on your sandwich platter? Capers and balsalmic in your tuna salad? Eating whole lemons ?(actually, that’s just my mother) If you, or someone you love has shown any of these symptoms, he or she may also possess the vinegar gene The only way to satiate it is to have multiple jars of pickles and vinegars in the pantry at all times.

Back to pan sauces. One of my favorite pan sauces is Piccata. I love Piccata because it includes lots of brine-y, acidic ingredients. White wine, capers, lemon---all these things are the tops. I guess there are zillion ways to make Piccata, and an Italian grandmother might turn her nose up at mine, but whatever. I make it a little different every time I make it. Sometimes it depends on my protein. If I make a seafood Piccata, like a swordfish or salmon, I don’t flour the fish. I just pan sear it and then make the sauce in the pan. These versions have more lemon; with extra lemon wedges serve on the side.  When I make it with chicken, and flour the cutlets, I use more oil and butter, so the sauce has a little less edge.

Piccata is also a favorite because it’s easy, and I generally have all the ingredients on hand. I buy big jars of capers at Costco, and use them in pasta sauces, tuna salad, and salad dressings.


Finished Product!

I made Chicken Piccata tonight and was really pleased with it. I had one really large chicken breast I thawed, probably about a half pound worth, so I stamped it out. I was tempted tot throw it on the grill pan and make tacos, but I didn’t have any corn tortillas---no corn tortillas, but I sure as shit had lemons, white wine, and capers. 
Lots of oil.

Golden goodness.

As I become more comfortable with pan-frying, recipes like this turn out better and better for me. Once I got over the amount of oil or butter it takes to get a really good golden brown, I’ve experienced excellent results. I browned the cutlets in this recipe in olive oil, and then used a butter and olive oil combo in the sauce. The olive oil keeps the butter from burning, and the butter adds a rich, creaminess.

Chicken Piccata (serves 2)

For the chicken:
½ pound chicken breasts, stamped out to ½ in thick
½ cup flour
¾ cup olive oil
salt & pepper

For the sauce:
2 tbs butter
1/3 cup olive oil
1 cup white wine
Clove of garlic, minced
Pinch red pepper flakes
Juice of one lemon (see note below*)
1/3 cup capers (more or less depending on your preference)

Stamp out the chicken breasts to ½ inch in thickness. Season the chicken with salt and pepper. Place the flour in a shallow bowl, or pie dish, and coat the chicken evenly on all sides with flour, and shake off the excess.

Heat the olive oil over medium-high heat. Once the oil is HOT, ie the chicken crackles and sizzles when you touch it in the oil, place the chicken in the pan, with space between, and brown on each side for about 3-4 minutes. Do not move it around, but monitor the heat of the pan. I turned the burner down to closer to medium while the chicken browned and it stayed hot enough.

Once the chicken is a nice golden brown, remove it from the pan and place it on a plate with a paper towel to help soak up excess oil. Get rid of the oil you friend the chicken in and wipe the pan clean with a paper towel.

Time to get saucy.

Melt the butter and heat the oil in the pan over medium high heat. Add the minced garlic and red pepper flakes and let it simmer for about 30 seconds. If you manage to burn the garlic, start over. You will know you burned it because it smells gross.

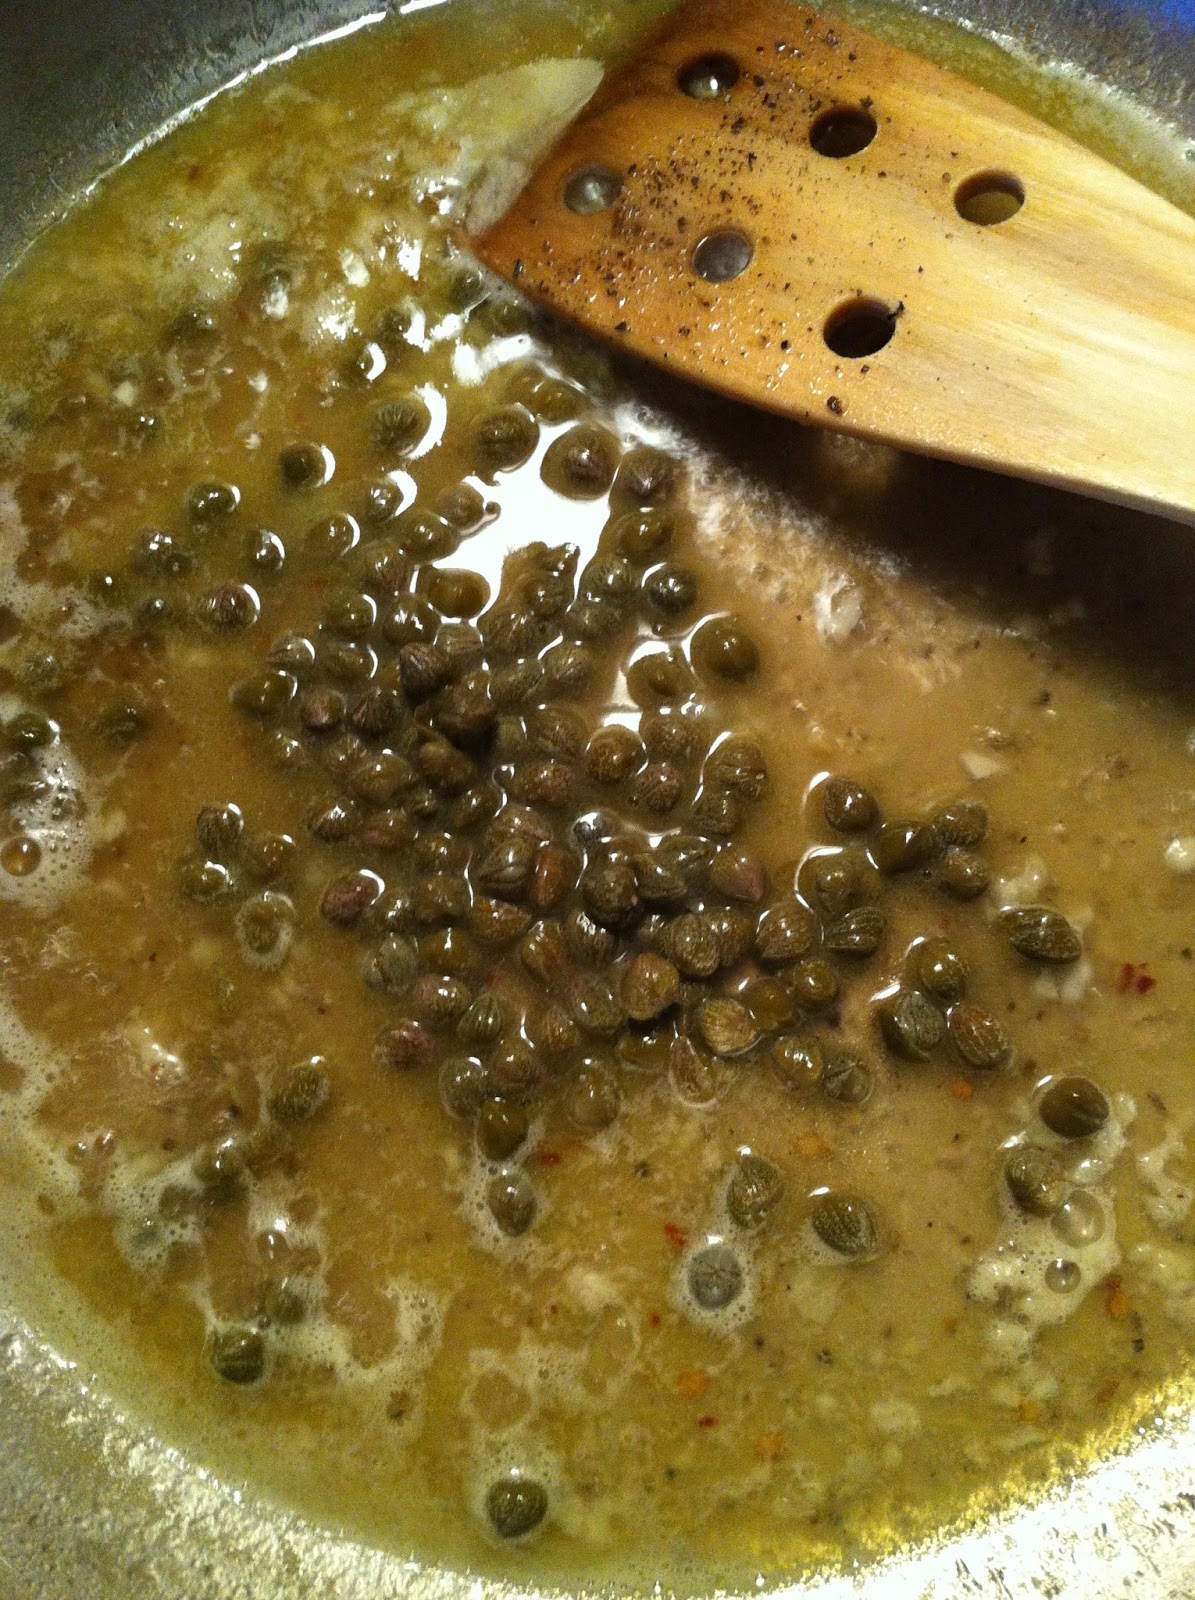
Dump the wine in the pan, and allow the sauce to simmer and the alcohol to cook off, about 2 minutes. After the initial sizzle and deglaze, I turned the heat down to medium while it simmered. Add the lemon juice and the capers, and allow to simmer for another 30  seconds – 1 minute. Season with salt and pepper to taste.

Couldn't you bathe in it?
Spoon the hot sauce over the chicken and enjoy immediately. This goes really well with pasta and roast potatoes if you want a starch, or just by itself. If you are serving this over pasta, you might want to bump up the amount of sauce by about a third.  I just had green beans with mine, so the sauce was just the right amount.

 *If you aren’t a huge lemon person, cut back on the lemon juice. Maybe start with juice of half a lemon and add more at the end. One person a lemon lover the other not? Keep the juice in the sauce minimal, and serve the chicken with lemon wedges.

Wednesday, April 17, 2013

Mise en Place


I would hardly call myself an organized person. I pay a lot of late fees, miss birthdays, make impulse purchases, and buy snacks when I already have a forgotten drawer full two feet away.  For every victory I achieve in organization, like changing my wardrobe from winter to spring, I am sure to incur at least one failure, like getting a notice that a small medical bill has gone to a collection agency because I forgot to pay it.  The one place that I really like to remain organized, however, is in the kitchen.

I mentioned before that I have received temporary and partial bans in the past from my mother’s kitchen because I would make horrific messes. A lot of the messes that I made stemmed from the fact I was extremely disorganized. I would forget a cup of sugar, forget to crack an egg, leave something on the burner too long, resulting in hasty last minute corrections laden with spills, splats, and yucks.  Thankfully, it is fairly easy to be organized in the kitchen with small amounts of planning and prep work.

One of my favorite culinary concepts is “mise en place”, which literally translates to, “put in place”. If you can follow the concept of mise en place, you can really get cooking in the kitchen (hehe).  You know how when you watch a cooking show, they have all those cute little bowls filled with the measured portions of the ingredients, and they just effortlessly dump everything in as they bop along? I mean, I’m sure Ina Garten has several slaves kitchen elves that do all this for her, but it’s really not that hard, and it makes life a lot easier.  Any home cook can do it, and feel super clever.

The first step to effective mise en place is reading a recipe thoroughly. I still don’t always do this, but I at least read the ingredients list, and pay attention to words like, chopped, minced, sliced, room temperature. 


most everything is out, the coffee isn't going in this recipe, though.
The second step is to pull out all your ingredients, although maybe first, while you are reading the recipe, you should check off (at least mentally) to make sure you have them in your pantry/fridge.  Some things like olive oil, salt, and pepper may be readily accessible near the stove and you don’t necessarily need to move them, but just make sure they are close by.  


chopped and loaded!

Once you have done these two things, you are ready to get moving. I sometimes move straight down the list of ingredients, finely slicing a piece of garlic, chopping tomatoes, cubing chicken, but I generally try to do all like ingredients together. I chop up all my vegetables, measure out all my spices, and pour all my liquids, giving my undivided to each ingredient group one at a time.

It is also important to keep in mind what tools you need to use for each part. Only have one good chopping knife? Do all your veg first and then your raw protein to avoid cross contamination and having to wash in between. The super pliable cutting mats can be useful to put over your cutting board if you are handling raw meat and don’t have a ton of counter space. I sometimes put them over the board, cut up the meat, then remove them and I can move on using the board below for other things without having to wash it right away.  As you finish doing what you need to do to each part, pay attention to what is all going to go to the same place at the same time. If you are going to put your garlic and onion in the pan all at once, they can share a mis en place bowl.  Are you going to add something to something else eventually? Make sure it is in a large enough bowl so you don’t get halfway through pouring and have an, “Oh shit! Splat!” moment.  

 I try to clean up as much as possible as I move along, and I believe it is critical. As long as you are not in a super rush, I suggest cleaning up between prep and cooking, or, getting one of your eaters to start cleaning up while you start cooking.  

Other important components/tips for getting your shit together mis en place:
  •         Removing lids and wrappers before you start cooking. Fancy bottles of olive oil are a notorious pain in the ass. I also get irritated by things that when you remove the lid, there is another foil wrapper. Don’t feel bad if you end up violently puncturing said foil wrapper, rage against the packaging is always OK in the kitchen!
  •         Uncork bottles of wine. Better yet, buy screw tops!
  •          Baking? Take butter/eggs out of the fridge several hours before you start so they are room temp.
  •         Buy a garlic press, trust me.
  •        Don’t be afraid to pay a little extra for cheese that is already grate or veggies that are already sliced and washed---especially if you are cooking for a crowd, or, just trying to get some chow on the table after work.
  •          When the can opener stops working, buy a new one. Don’t f&*% around. Of course, open all canned goods and drain/rinse as appropriate prior to beginning to cook.
  •  Target sells little plastic colanders in the dollar section that hold about 2 cups of anything--- beans that need to be drained, fruits and veggies that need to be rinsed--- buy a few of these!
  •          Invest in more than one rubber spatula. Williams Sonoma always marks the seasonal color ones down and they are top quality, or, just  go to Ikea.
  •         I keep disposable paper bowls around that I sometime use as ingredients holders just to cut back on clean up. I try to avoid this, go green, but for messy ingredients, they can be very helpful.
Last night, I made something that having my mis en place applied to beautifully. Having all my veggies chopped, chicken cubed, cans opened, and seasoning out made this meal even easier than it already was. 

I wanted something homey and full of veg. I am also getting ready to move in about 6 weeks, so I am trying to pick stuff from my pantry that I already have and can use up. I have tons of spices from my trip to Turkey and although most are still vacuum sealed, I knew I had some open chicken seasoning that needed to be used up. Spices are actually not difficult to move, but I had noticed the canister the other day, and was craving something of the Mediterranean persuasion.  I stopped at the terminal on the way home and picked up $1 bags of red peppers and eggplants, as well as a red onion and a lb of boneless, skinless chicken breasts. 


Veg in the pan, ready to tan!
I decided to roast the veg and add them to the stew last minute because why not? I love roasted eggplant and I didn't want to simmer the veg to death. It also made cooking easier because once I had browned the chicken, I was done with any pan frying and I just had to stick the pan of vegetables in the oven while I finished up the sauce and the chicken. Once the sauce was made, the chicken put back in it to cook through, and the veg in the oven, I had about 15 minutes to CTFO. 

This was delicious and I would make it again. I had a carb heavy day so I skipped a starch, like cous cous or crusty bread, but an accompanying grain would've been tasty. I forgot to pick up feta, so I finished it off with some Pecorino Romano and a drizzle of olive oil. 


Mediterranean Chicken Stew (approx 4 servings)


1 red pepper, roughly chopped

1 eggplant, chopped into 1 in cubes
2 cloves of garlic, minced
1 red onion, chopped
1 can crushed tomatoes
1 cup white wine
1 lb chicken (I used boneless skinless breasts, but thighs would be good, or anything bone in)
2 tbs turkish chicken spice
1 tsp red pepper flakes
olive oil
salt and pepper

Preheat oven to 400 degrees. Chop and prepare vegetables.  Toss the vegetables with olive oil and season with salt and pepper. Spread over large baking sheet, but don't put it in the oven yet, set it aside.  

If using boneless, skinless breasts, cut into 1 1/2 in cubes. Season generously with salt and pepper and chicken spice. Heat about 1/4 cup of olive oil in skillet over med high heat. Place chicken in pan and stir ~ every 2 minutes, browning it on all sides. Once brown, remove chicken from pan and set aside.


Add onions to the same pan you just cooked the chicken in and season with salt and pepper. Add more oil if necessary.  Once onions begin to brown, add garlic and red pepper flakes, and sautee for about 30 more seconds. Deglaze the pan with the wine, allowing the alcohol to cook off, simmering for about a minute. Add the tomatoes.  Bring sauce to a simmer and place the chicken back in the pan.  Turn the heat to med-low, cover the pan, and put the vegetables in the oven. 


Sauce pool ready for the chicken to dive back in.
Allow the chicken to simmer and the vegetables to roast for about 15-20 minutes. When the vegetables are done, add them to the chicken and the sauce and stir. Let the stew sit for about 5 minutes over low heat to let the sauce seep in. 


Serve stew over top cous cous, or with crusty bread, or by itself with a sprinkle of feta or hard, sharp cheese on top and a drizzle of olive oil. 


om nom nom nom nom